Add an interactive image
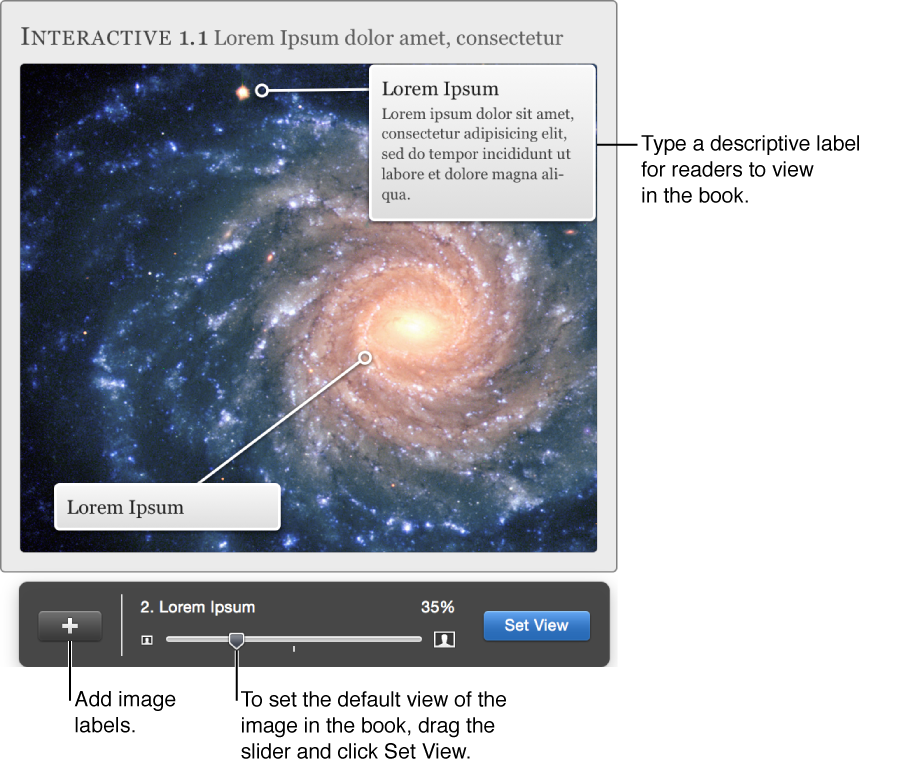
You can provide detailed information about specific parts of a graphic using the Interactive Image widget. Readers can zoom in to enlarge the graphic, tap or click a label to view its complete description, and easily navigate from label to label.

Create an interactive image
-
Choose Interactive Image from the Widgets pop-up menu in the toolbar.
The widget appears on the page with two labels.
-
To add an image file to the widget, do one of the following:
Drag a file from the Finder or the Media Browser.
Copy a file in iBooks Author, select the inner image area in the widget (not the outer widget border), and paste the file.
Important: Images can’t be larger than 25 megapixels (5000 x 5000 pixels) or 50 MB.
To set the default view displayed in the completed book, select the image area (not the outer widget border). In the overlay that appears, drag the slider to change the magnification, drag the image to position it within the frame, and click Set View.
-
To customize label text, click one of the sample labels and edit the placeholder text.
To add another label to the image, select the widget and click the Add button (+) in the overlay.
Tip: If your labels are longer than a few lines, you can select “Show descriptions in sidebar” in the Widget inspector to display them in an overlay on the widget’s left side.
-
To customize how the image’s labels are displayed, do any of the following:
Rename a label: Double-click the label and edit the text.
Move a label or its target (the endpoint the label points to): Drag it.
Change the label navigation order: Click Interaction in the Widget inspector, and drag the labels into a new order in the Views list.
Set the view that appears when the reader taps or clicks the label: Select the label, adjust the zoom and position, and click Set View in the overlay.
To display controls that enable you and your readers to easily navigate between views, select “Show transport controls” in the Interaction pane of the Widget inspector.